In this article, we would see how you can configure the newly downloaded Extended Forms Add-on.
The first step that you need to do is open any of the Google Form from the specified account that has the Extended Forms Add-on Installed.
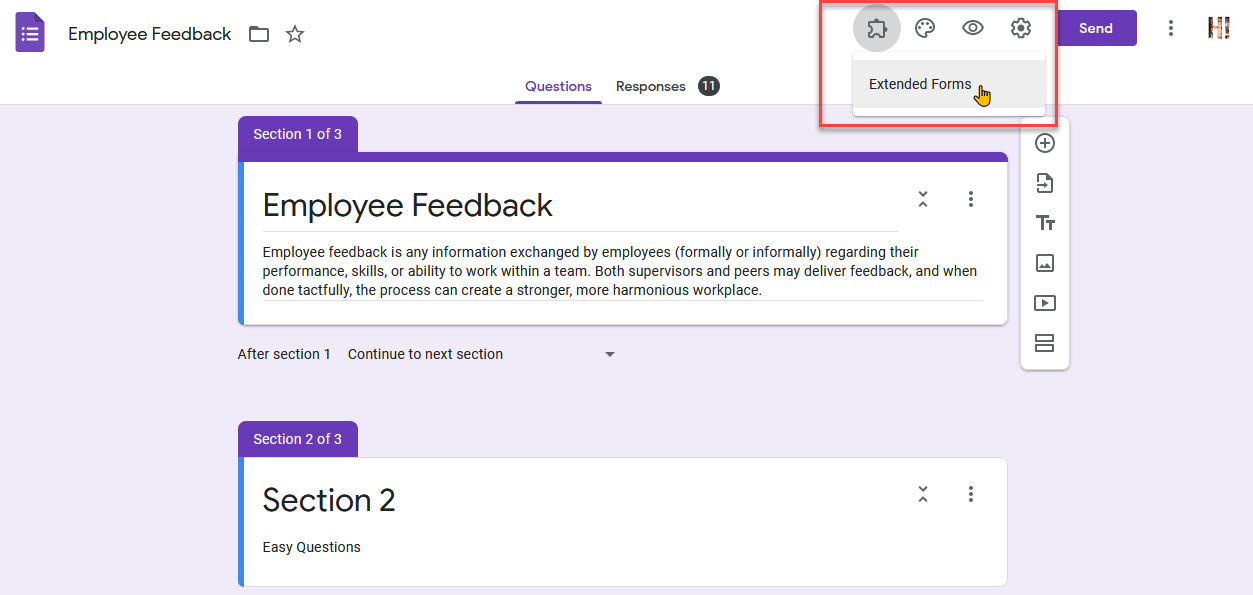
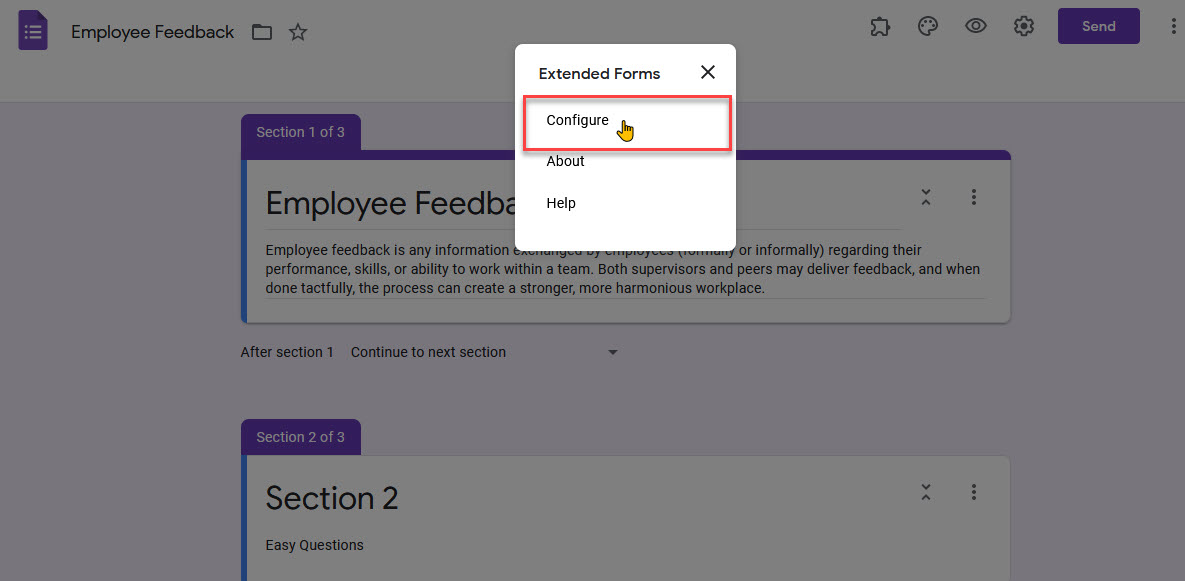
Now, Navigate to Add-ons > Extended Forms by hitting the Addons icon from the Top Menu.
This opens up a small Extended Forms Settings Box Appearing on the Bottom Right of the Browser Window.
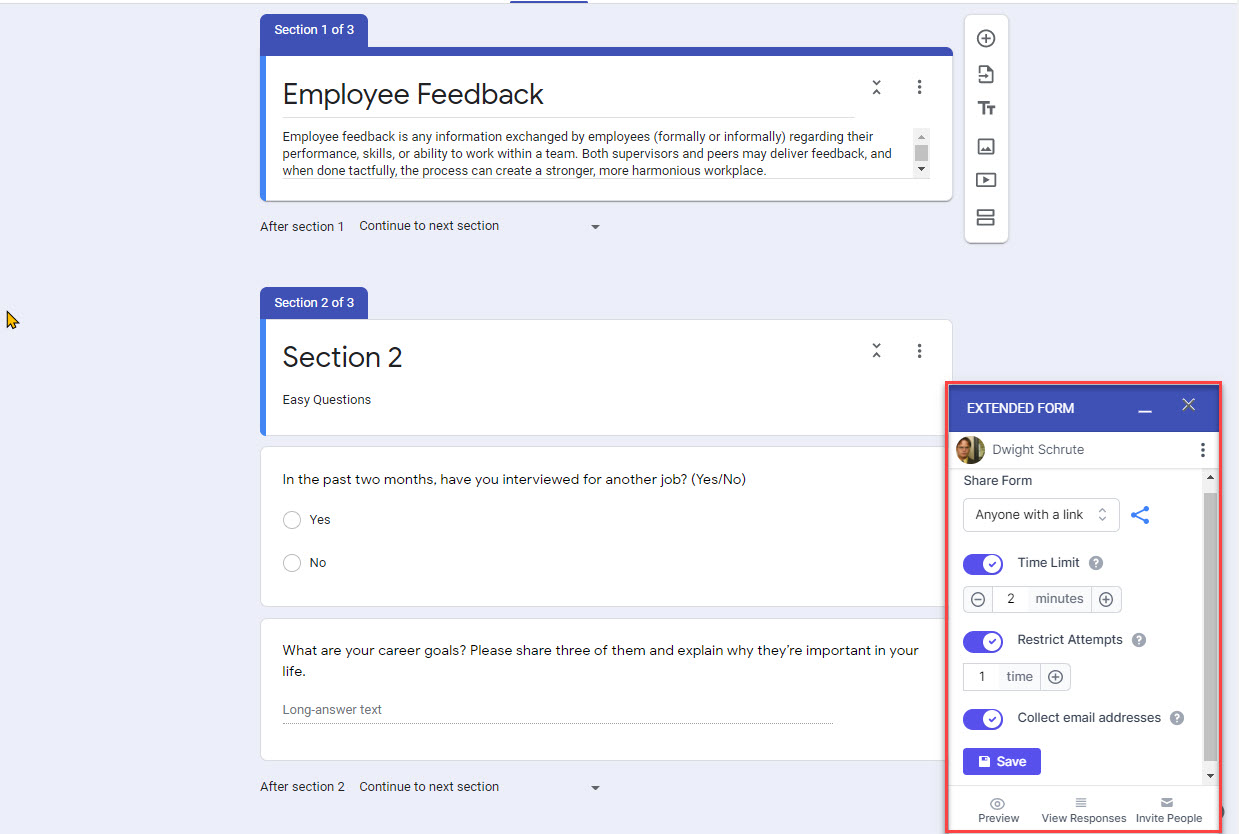
You will be presented with the below options:
- Share Form – You can share the form as public with the permission as
- Public i.e let anyone with the given link can access the form or
- Invite Only allowing only invited members where only those users with the desired link can access the form.
- Time Limit – Enabling this option will set the Time Limit in minutes, which means how long you want the timer to operate and the form to be active, after which the form can’t be edited and the results will be captured. Switch off means no time bounding.
- Restrict Attempts – Restrict the number of attempts one can have with Restrict Attempts, each user will be provided ‘n’ number of attempts as required. Switch off means any number of times.
- Collect Email Addresses – By Enabling this option you can collect user’s email addresses Respondents email address will get auto-filled in the form

Next, you can also access the Extended Forms Settings by Navigating to the Extended Forms website or by pressing the View Responses Button in the Extended Forms.

This will take you to the Extended Forms website where you can further configure the Extended Form.
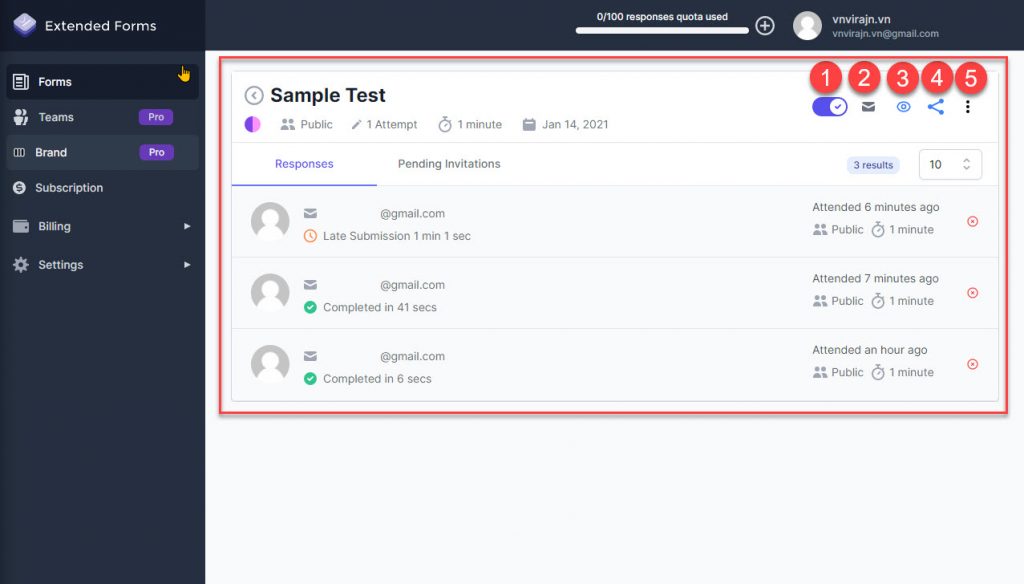
So, in the current windlow you can see various form details. To make it more simple look into the above image and follow the numbers.
- Toggle Accept Response – With this Toggle button you can make the Extended form Active/Inactive. When the button is inactive state it will start accepting the user responses.
- Send Invitation – This will let you to send an invitation to those who you wish to allow and give the test/take the survey. You need to specify every user’s email id separated by the next line.
- Preview Form – Hitting this button will provide you with a live preview of the newly created Extended Form in a new browser tab.
- Share Form Link – Clicking on it will automatically copy the form link and you can send it to any of the intentional responders via. email or have it as a hyperlink or use it as a button.
- More Settings – Here you will find options to Export the collected details as a CSV, Navigate to google Classroom, Visit Google Form, Access More Form Settings, and Transfer ownership to another person.
So, to continue configuring the Extended forms you need to Navigate to Forms > Your Connected Forms (Choose the form you need to configure) > Hit the 3 Vertical Dots at the Top Right Corner of the Opened Form > Form Settings.
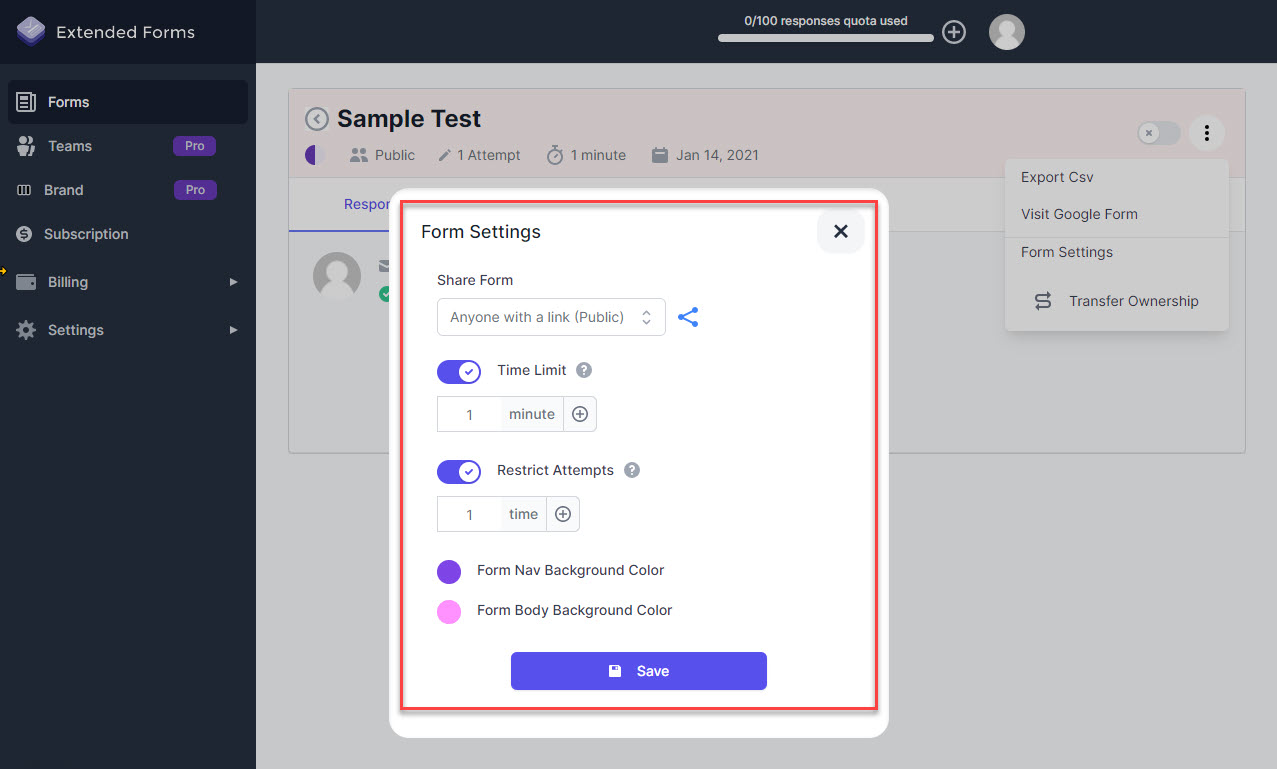
This will pop open a small settings window which will have the similar settings which we looked earlier before navigating to the Extended forms website.
But, this settings consists of two news options called:
- Form Nav Background Color – For changing the Form’s Navigation Bar Background Color
- Form Body Background Color – For changing the Form’s Body Background Color
This is all that you need to configure the Extended Forms on to your Google Forms.
Next, we will lean how you can Transfer the Ownership of the Extended Forms.