If you are thinking about how you can make your Google form more personal and quite impressive to the users then read more.
In this article, we are going to explain how with the help of the Extended Form messages feature you can add a welcome message and an invitation message.
To start with, open Google Forms from any specified account that has an Extended Forms add-on installed.
Go to Addons > Extended Forms > Configure, you will then see the settings box on the right side. Click on “View Responses” or “Invite People” and it will directly lead you to the extended form page.
You can also directly go to the Extended Forms page through the Extended Forms website.
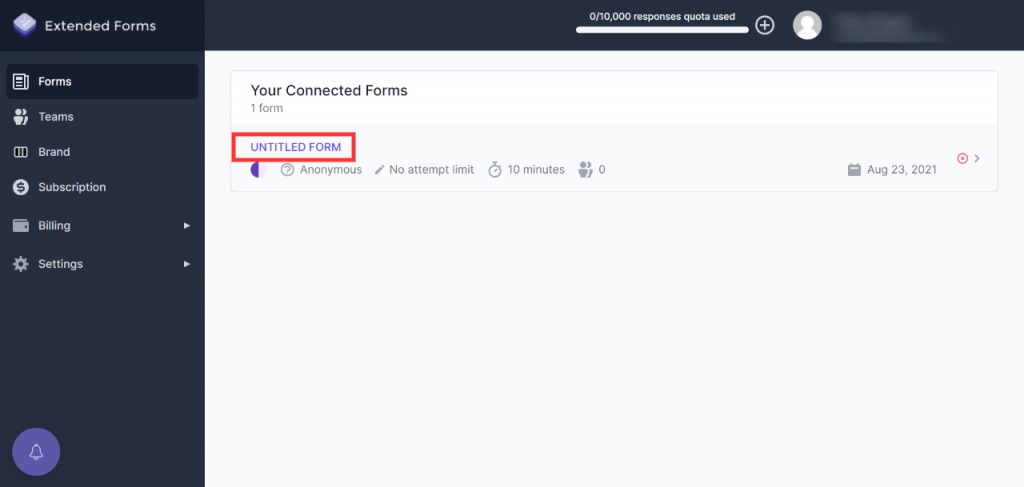
Now click on the google form you have created (as mentioned in the above picture). It will lead you to a page like this.
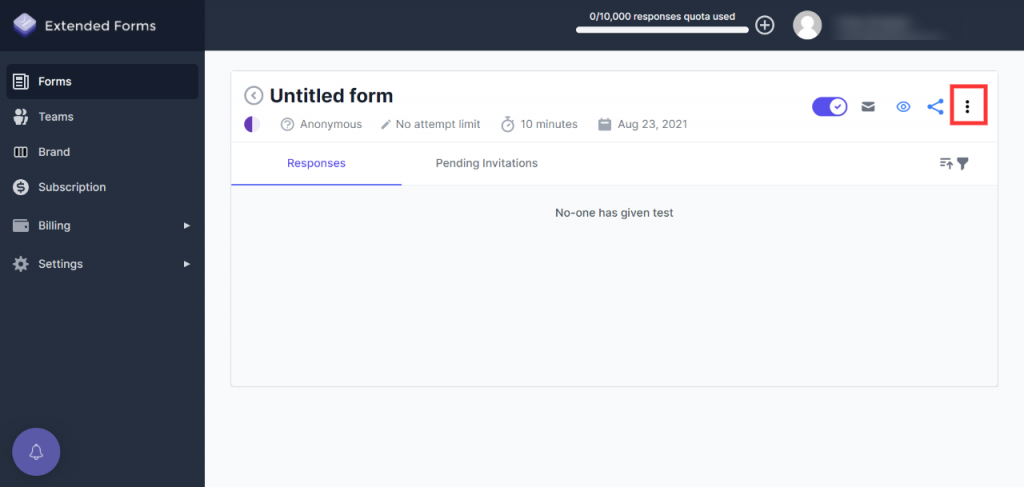
Click on the “⁝” dots at the top right corner (shown in the above picture), you’ll see the “Welcome Message” and “Invitation Message” options.
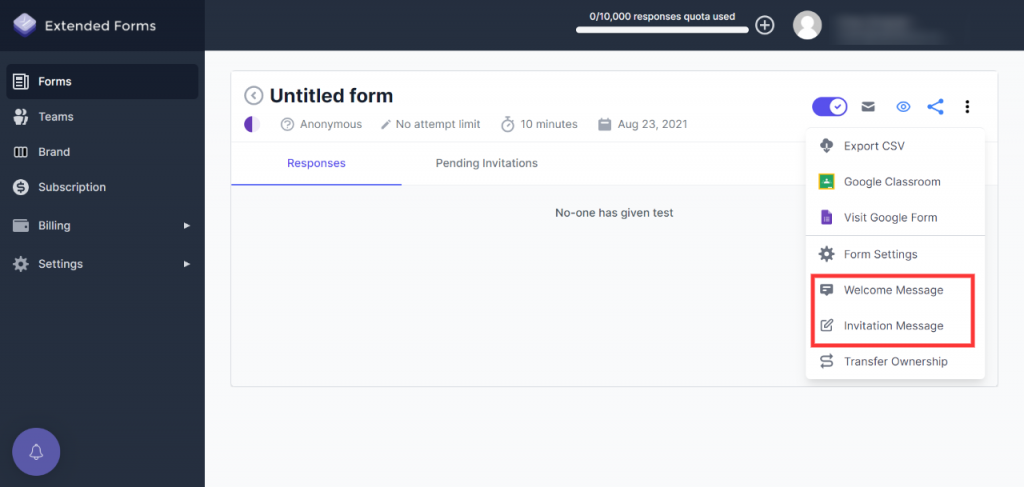
Then navigate to the “welcome message” feature and it will open up to a text box.
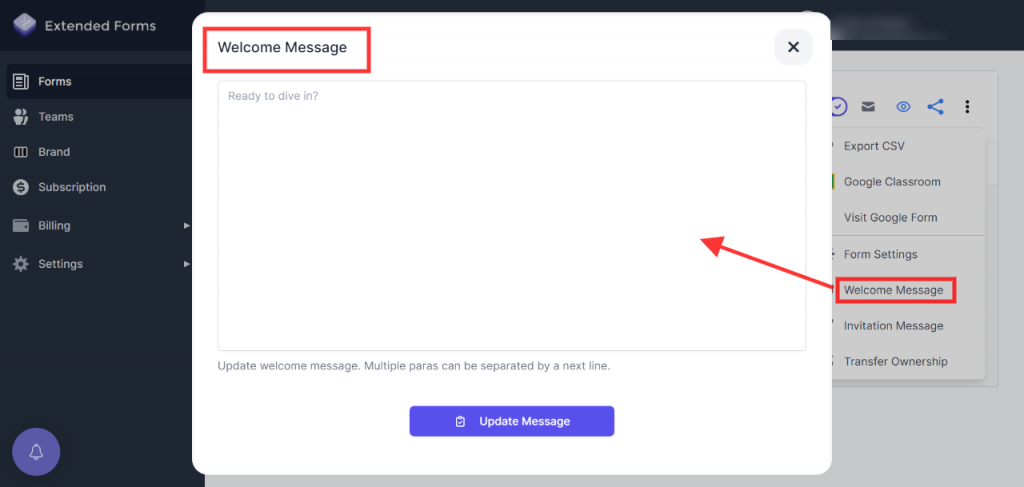
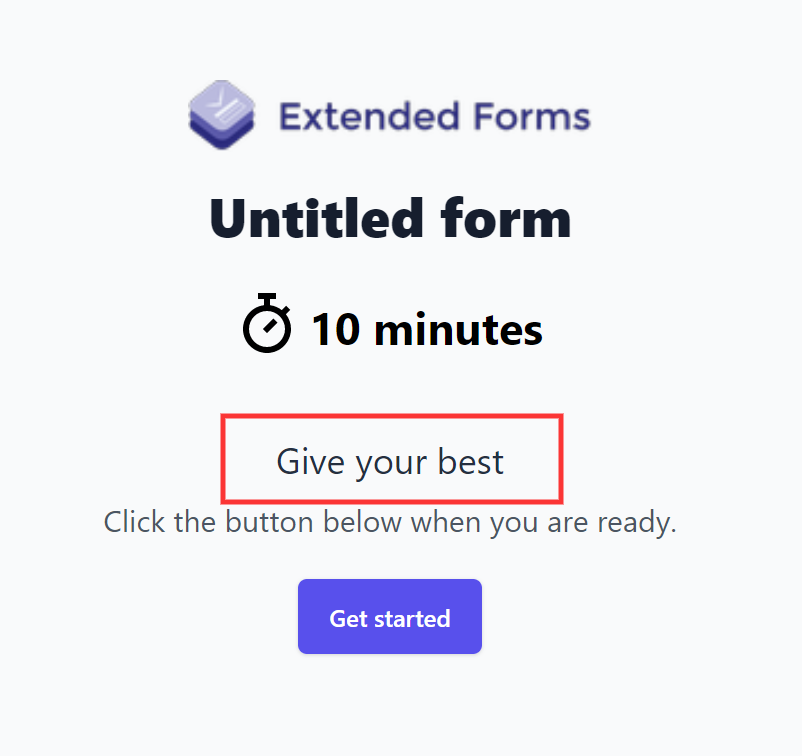
Further, add a customized welcome message and click on “Update Message” which will be seen by users before the quiz/exams start. Like this.
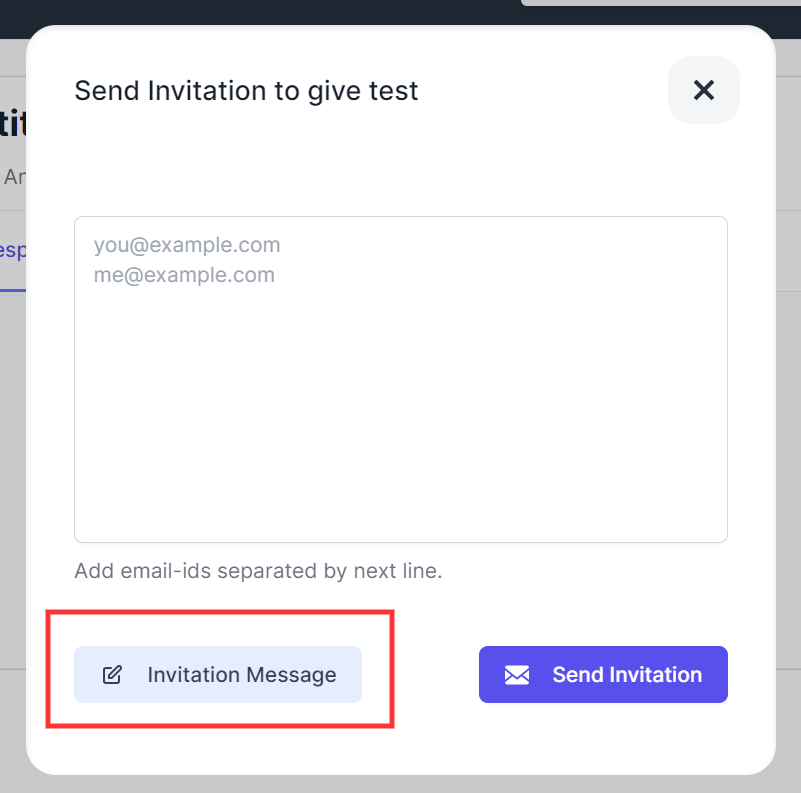
Now for the invitation message, navigate to “Invitation Message” below the welcome message to open the invitation message box.
You can also go to the invitation message box through “Invite people/ Send Invitation.” Then click on the “Invitation Message” as shown in the picture.
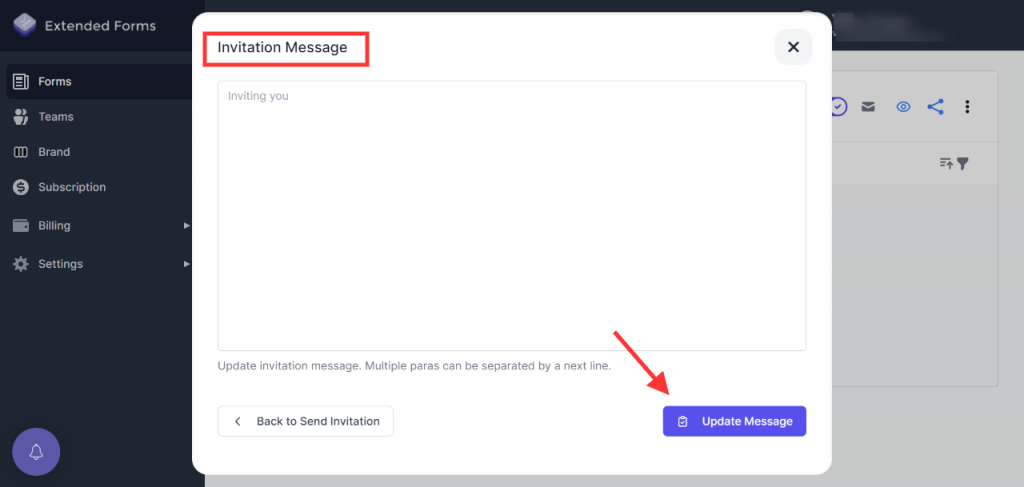
It will lead you to the invitation message dialogue box. Customize it as per your requirement and click on “Update Invitation” to save your invite.
Now it’s time to send invitation messages to your users!